Skip to content
-
Subscribe to our newsletter & never miss our best posts. Subscribe Now!
MtnBikeRiders.com

Just an old mountain biking site

MtnBikeRiders.com

Just an old mountain biking site

  • Home
  • Contact US
  • FTC Disclaimer
  • Guest Posts
  • OFFICIAL RACE TEAM
  • Store
    • Cart
    • Checkout
    • Clear
    • IPN
    • Receipt
  • About MtnBikeRiders.com
  • Home
  • Contact US
  • FTC Disclaimer
  • Guest Posts
  • OFFICIAL RACE TEAM
  • Store
    • Cart
    • Checkout
    • Clear
    • IPN
    • Receipt
  • About MtnBikeRiders.com
Close

Search

  • https://www.facebook.com/
  • https://twitter.com/
  • https://t.me/
  • https://www.instagram.com/
  • https://youtube.com/
Subscribe
How To's/Tech Tips

Ghetto Tubeless Part 1

By RL Policar
January 21, 2010 1 Min Read
1

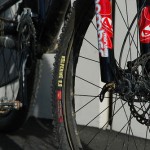
For the last 6 months I’ve been riding with a Ghetto Tubeless Conversion. Yah its called GTC because its a cheaper version of the Stan’s Tubeless Conversion. Before I start, I need to say that if you attempt to do any of this, you’re on your own. We’re not responsible nor do we recommend you do anything to void the manufacturer’s warranty as well as place your self in harms way by modifying your bicycle in any way.

I’ll be doing this in a multi part series to help you understand what we’re about to do. There’s a few things you need.

20 or 24″ tubes (2)
Stan’s Sealant
Air Compressor or Co2 inflator
We’ll be using stock rims and tires. No need for UST stuff.

Ok, that we got your parts list on hand. We’re ready to start on the project. But we’ll do that on the next post.

Make sure you check back every few days as I’ll be updating this series.

Related posts:

  1. How to: Ghetto Tubeless
  2. Sneak peak of the 2011 Jerseys
  3. DIY Ghetto Tubeless Tires – It Works!!!
  4. Ghetto Tubeless follow up…3 years later!

Tags:

ghetto tubeless
Author

RL Policar

RL Policar is an avid mountain biker and the Editor In-Chief of MtnBikeRiders.com and BikeCommuters.com. Between the two sites, he's published well over 4,000 articles (and growing).

Follow Me
Other Articles
WTB Wolverine Tires Review
Previous

WTB Wolverine 2.2 Review

Next

Ride: San Juan Trail 01-03-2010

One Comment
  1. Mobile Hard Drive : says:
    October 26, 2010 at 4:55 am

    we always use air compressors in spray painting and also in blowing off those hardened dust on our home.-;

Leave a Reply

Your email address will not be published. Required fields are marked *

Links

  • Cock Coffee

Archives

Recent Comments

  • Fabricio Delfino on Review: KHS DH200 Downhill bike
  • Craig Cuttone on REDLINE’S NEW D880 & D860 and Hardtail D680 29er’s
  • JML on Product Review: Mighty Mendit
  • Hardtail Mountain Bikes: Exploring the Pros, Cons, and Best Use Cases on Full suspension or Hardtail? Pros and cons
  • Ray Johnathan on Nulksen Tire Inflator Portable Air Compressor first impressions

Links

  • Cock Coffee

Categories

  • 29er
  • All- Mountain
  • Articles
  • California Mountain Bike Directory
  • Company Profiles
  • Downhill
  • ENDURO
  • Events
  • How To's/Tech Tips
  • Humor
  • Injurded Rider
  • Interbike 2007
  • Interbike 2008
  • Interbike 2009
  • Interbike 2010
  • Interbike 2011
  • Interbike 2012
  • Interbike 2013
  • Interbike 2015
  • Interbike 2017
  • Main
  • Mountain Biking
  • News
  • Nonsense
  • Off Topic
  • Products
  • Projects
  • Reviews
  • Ride Reports
  • Safety
  • Screen
  • Sea Otter 2007
  • Sea Otter 2008
  • Sea Otter 2009
  • Sea Otter 2011
  • Sea Otter 2015
  • Sea Otter 2017
  • Single speed
  • Team MtnBikeRiders.com
  • WTF
Copyright 2026 — MtnBikeRiders.com. All rights reserved. Blogsy WordPress Theme