
Have you ever taken a sip of your water as you are riding and it just tasted NASTY?!?!?! Many of us have. This is a result of not completely drying your hydration bladder after use and the build up of “gunk†in the bladder and hose. The most conventional way of drying is using a specific hanger where it opens up the bladder to air dry. However for many who ride frequently, the bladder never really has a chance to fully dry. Now there is a solution…
New from ZER0GOO is the Hydration Bladder Dryer. It is a compact fan built to fit in the mouth/opening of your bladder. It is made from plastic and requires an electric power source (included). The dryers do not emit heat, just the air with the room temperature to dry.
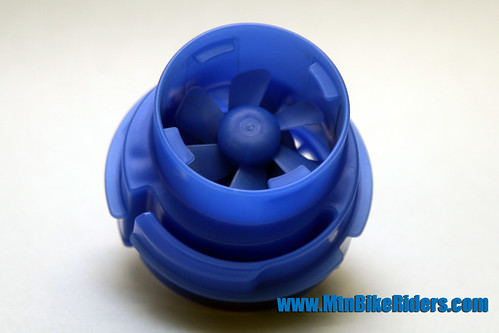
Here are simple steps:
- -Â Â Â Â Â Â Remove the mouthpiece from your tube/hose so the air can have a clear path.
-Â Â Â Â Â Â For faster drying, drain the excess water/liquid from the bladder before attaching the unit
-Â Â Â Â Â Â Insert the fan into the opening of the bladder
-Â Â Â Â Â Â Attached/plug the power source
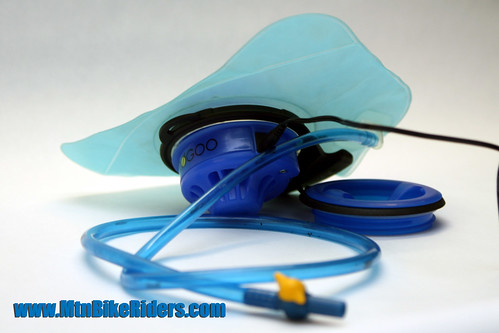
Drying time can vary. Depending on your location geographically, humidity can be a factor. For example in Denver it takes approximately 40 minutes while in Miami it can take upto 2 1/2 hours. Drying time is also dependant on the size of your bladder. Since receiving the unit for review, I’ve only used my small Camelbak bladder, 45oz., made to fit the fanny type bags. Although I haven’t timed it yet, I am confident that it was dry with in an hour’s time.
I’ll be putting this unit to the test. I have several bladders that I use, different in size. Look for a complete review in the next few months. Drying and having the taste of fresh water during your ride has never been made easier!Â
For more information log onto www.zerogoo.com

-
-
-
-
-
Show CommentsAnother (and cheaper) method is to store your bladder in the freezer. Bacteria, mold, fungus, etc, can’t grow w/o light and heat.
After a ride, if only water was used in the bladder, empty it out as best you can, then put it in the freezer. Don’t screw the cap down…it’s a PITA to get off once it’s frozen in place!
If you had more than just plain ol’ water in the pack (gatorade, powerade, etc), I wash it out w/dishwashing soap (making sure to rinse it out really well!) then place it in the freezer.
Denture cleaners like Polident are a good substitute for the Camelbak cleaning tabs. You can also use a teaspoon of Arm and Hammer baking soda to get rid of smell and taste as well.
I would also consider upgrading to the newer bladders and tubes if you have the older bladders. The newer bladders and tubes have ‘grunge guard’ which resists crap build up.
I’ve NEVER dried out or cleaned my hydration pack. Ok I did once…but as I type that thing is in my car.
All good points…
DMan – I’ve heard of the freezer method as well although I have never tried it. For me, I keep all of my gear together in the garage so when I leave in the morning I just grab everything and go. Prior to receiving the ZER0GOO dryer I was hang drying. As I stated in the article, often times it wasnt completly dry on my next ride. In addition, I’ve been fortunate that my freezer is always full 🙂 therefore there’s no room…
Dial Tone – One of the bladders I use is the older Camelbak w/the smaller opening. I’ll have to try your suggestion w/the Arm & Hammer. This bladder is the only one I use for drinks like Cytomax…so after the ride I have to wash the inside.
Oh and one more thing: Look into the Source bladders. Not only does the plastic has the grunge guard but the closure system is different than Camelbak and other clone bladders. Instead of a screw cap, it has a plastic slider on top similar to ziplock bags. Theres enough space to insert your hand for cleaning and for drying you just keep it open and upside down like a water bottle.